Introduction

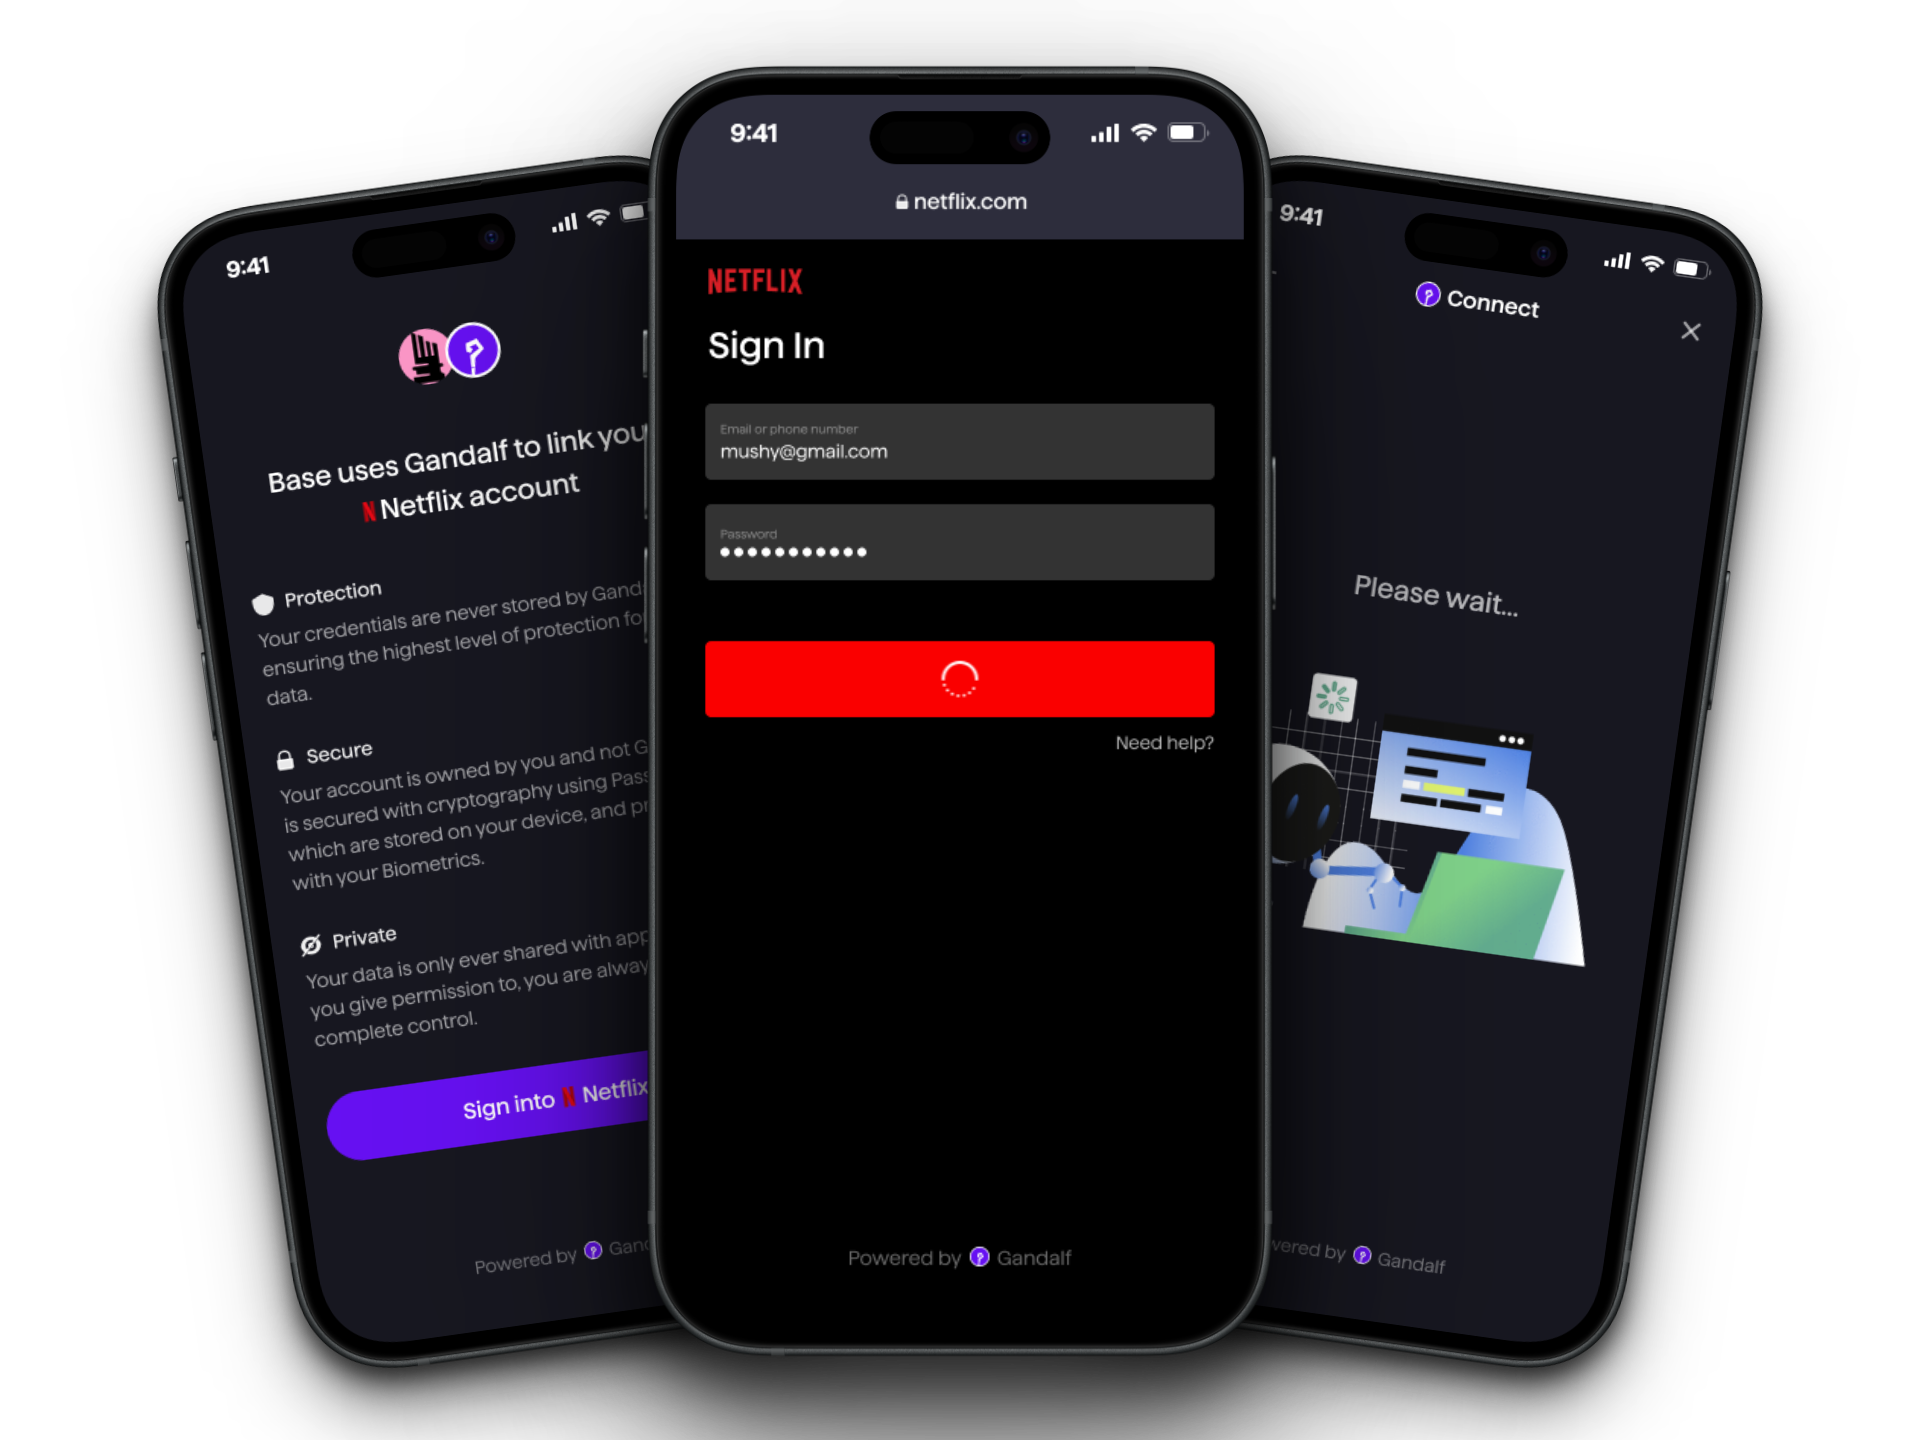
  • Connect is the client-side component that your users will interact with in order to link their accounts to Gandalf and allow you to access their data.
  • Connect will handle credential validation, multi-factor authentication, and error-handling for every service that Gandalf supports. You can use Connect in any kind of application (web or mobile) - it’s as simple as just adding a link to your app.
  • Connect is an App Clip & Instant App. These let users enjoy native app experiences without the need to download a full app. Learn more on Apple Developers & Android Developers

To try Connect, check out the whoami.tv Example.

Connect Flow

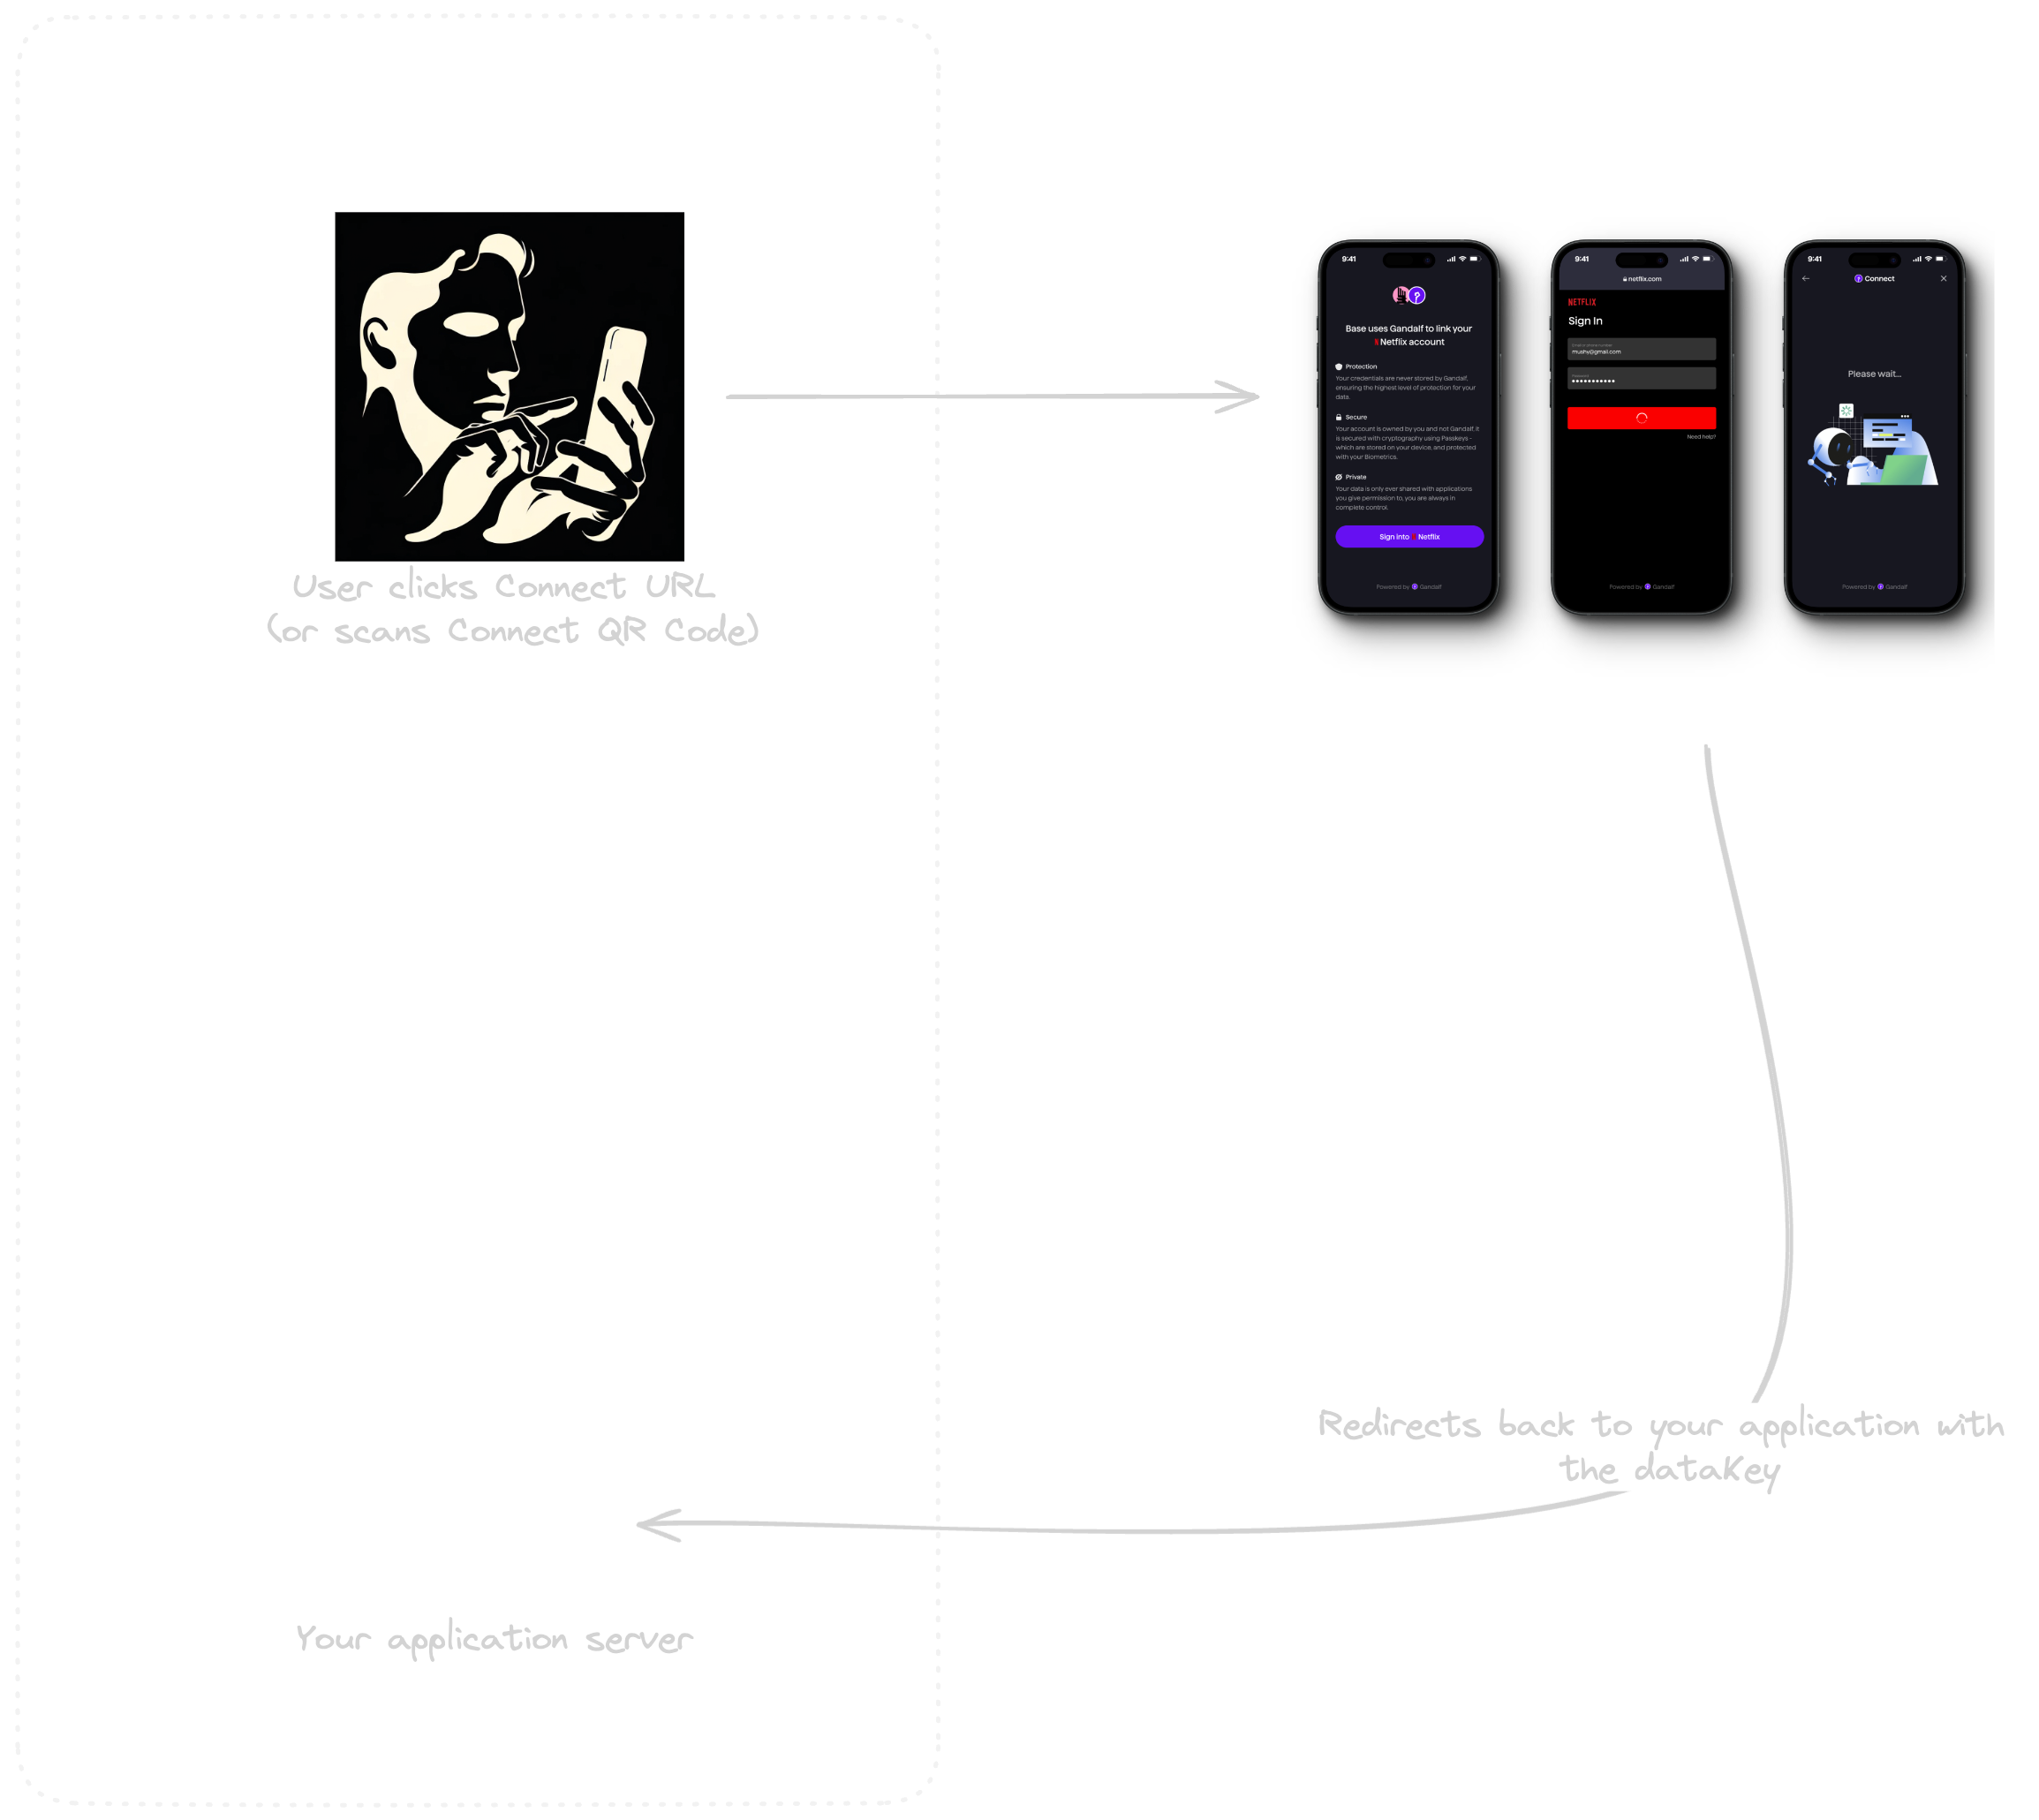
The diagram below shows how Connect is used to obtain a dataKey, which is used server-side to request data.

The flow begins when your user wants to link their account/data to your application.

  1. Open Connect for your users by navigating to the Connect URL. Pass your publicKey, redirectUrl and the service(s) you want to read data from.
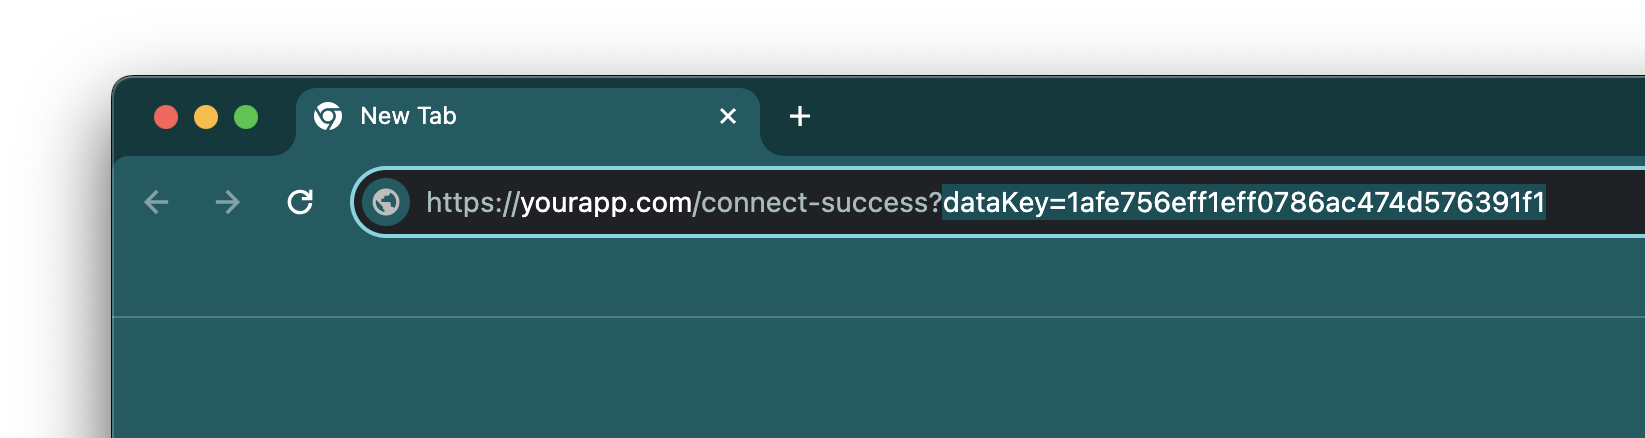
  2. After your user is done linking their account(s), Connect will navigate to your redirectUrl with a query parameter called dataKey.
  3. This dataKey will be used to make requests to the Sauron API

Connect Helper Package

We provide packages to make it easy to generate a valid Connect URL. The Connect helper handles parameter validations automagically!

Install Using Swift Package Manager in Xcode

  1. Open your project in Xcode.
  2. Go to File > Add Packages....
  3. Enter the repository URL: https://github.com/gandalf-network/connect-ios-sdk.git.
  4. Choose the version rule (e.g., “Up to Next Major”) and click Add Package.
  5. Select the GandalfConnect package for your target.

Or Update Package.swift

// swift-tools-version: 5.9
import PackageDescription

let package = Package(
    name: "YourProjectName",
    dependencies: [
        .package(url: "https://github.com/gandalf-network/connect-ios-sdk.git", .upToNextMajor(from: "1.0.0"))
    ],
    targets: [
        .target(
            name: "YourTargetName",
            dependencies: ["GandalfConnect"]
        )
    ]
)

Then, run swift package update to fetch the dependency.

Usage

Import the package

import GandalfConnect

Initialization

Create an instance of ConnectInput with the necessary details:

let services: InputData = [
    "uber": .service(Service(traits: ["rating"], activities: ["trip"]))
]

let input = ConnectInput(
    publicKey: "yourPublicKey",
    redirectURL: "https://example.com",
    services: services
)

Initialize the Connect class:

let connect = Connect(input: input)

Generating URL

To generate a URL, call the generateURL method:

do {
    let generatedURL = try await connect.generateURL()
    print("Generated URL: \(generatedURL)")
} catch {
    print("Error generating URL: \(error)")
}

Read more on Github.

Get Data Key

After your user is done linking their accounts, Connect will navigate to your redirectUrl with a query parameter called dataKey.

You can use the packages to get the dataKey easily.

Proceed by sending the dataKey to your server, where you can securely request the data you seek.

Alternatively, your redirectURL could be a server-side endpoint. You can get the dataKey directly from your application’s server.