Overview
Get your API Keys
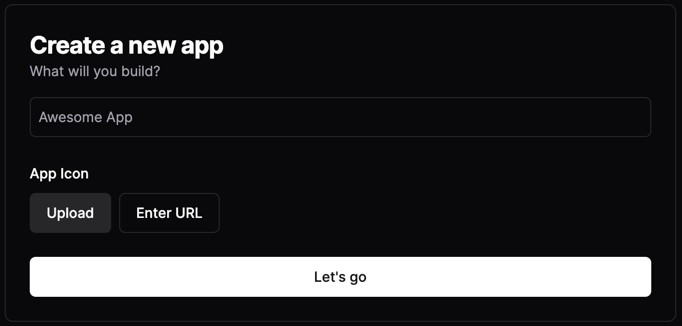
Create your first app
Create your first app
- Go to the dashboard.
- Enter your awesome app’s name & upload a square icon image.
Secure your keys
Secure your keys
Once your app is created, you will be presented with two keys:
- Public Key: This will be used client-side to initialise the Connect App Clip.
- Private Key: Your private key will be displayed just once. It is generated in your browser and not stored on our servers. Store it securely now. You won’t get another chance.
Connect App Clip & Instant App
Simply launch the Connect in your application using a URL. Here’s how to construct the Connect URL.App Clips & Instant Apps let users enjoy native app experiences without the need to download a full app. Apple Developers & Android Developers.
Connect Helper Package
We provide packages to make it easy to generate a valid Connect URL. The Connect helper handles parameter validations automagically!- iOS (Swift)
- JavaScript/TypeScript
- Android (Kotlin)
Install Using Swift Package Manager in Xcode
- Open your project in Xcode.
- Go to
File>Add Packages.... - Enter the repository URL:
https://github.com/gandalf-network/connect-ios-sdk.git. - Choose the version rule (e.g., “Up to Next Major”) and click
Add Package. - Select the GandalfConnect package for your target.
Or Update Package.swift
swift package update to fetch the dependency.Usage
Import the package
Initialization
Create an instance ofConnectInput with the necessary details:Connect class:Generating URL
To generate a URL, call thegenerateURL method:Finally, pull the data
1
Get Data Key
After your user is done linking their accounts, Connect will navigate to your 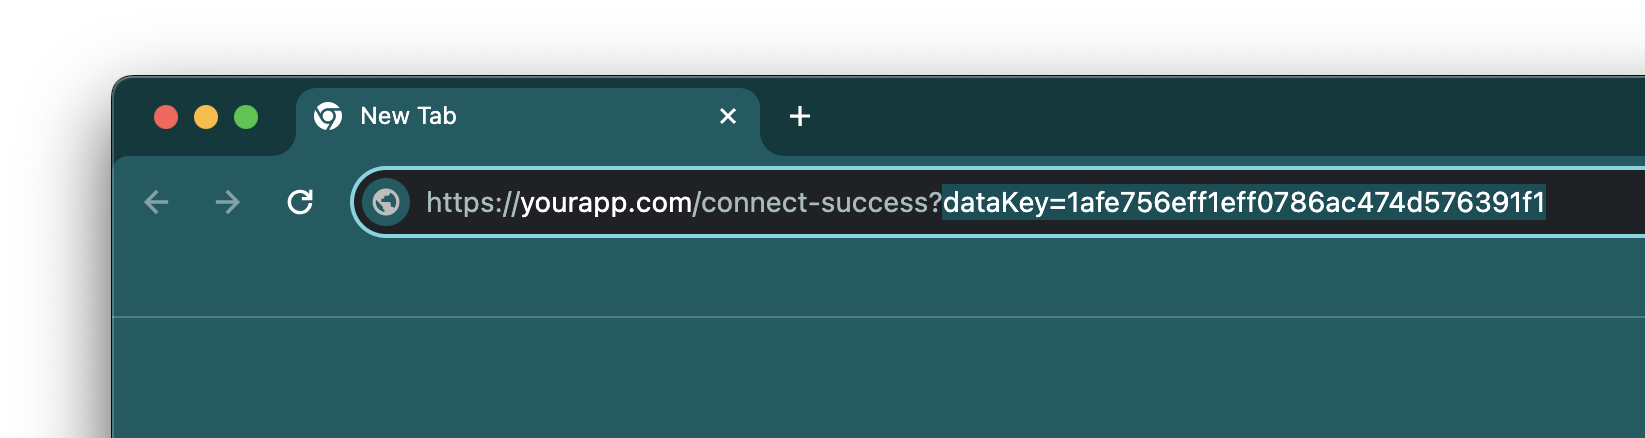
redirectUrl with a query
parameter called dataKey.dataKey easily.2
Securely request the data (server-side)
Sauron Helper Packages
We provide packages that makes it super easy to interact with the Sauron API. They completely abstract away the complexity of authentication and interacting with the GraphQL APIs.- Node.js
- Python
- Go
Read more about getActivity's parameters.
Read more about getActivity's parameters.
This is the key that gives you permission to access the user’s data. Read how to get one
here.
This is how you specify which service you want to retrieve activity from. This can be
NETFLIX,
AMAZON, PLAYSTATION.The number of activity records to be retrieved (per page). The maximum per request is 300 records.
Read more about getTraits's parameters.
Read more about getTraits's parameters.
This is the key that gives you permission to access the user’s data. Read how to get one
here.
This is how you specify which service you want to retrieve traits from. This can be
UBER,
AMAZON, etc.The labels of the traits you want to retrieve traits from. This can be
RATING, TRIP_COUNT, PRIME_SUBSCRIBER etc